Adventure Bike Maintenance
The demands on an adventure bike are fairly high so it's important to keep on top of maintenance to ensure your bike remains in sound condition. While bike maintenance can’t prevent all mechanical failures, 99% of a bike's reliability is as a result of good maintenance.
Ignoring maintenance can cause you grief out on the trails and ruin a good ride. You certainly don't want to be “that guy” who holds up an entire riding group because you forgot a key piece of maintenance!
The list below runs through key adventure bike maintenance to keep your machine in reliable adventure-ready shape.
Motor Oil
Motor oil is the lifeblood of your machine. When fresh oil is in your motor all your moving parts are adequately lubricated ensuring long life. However if your oil has reached the end of its life to the point it is no longer providing protection, it will be causing damage to your motor. Similarly, if you are not running the correct level of oil, the oil pump can starve and fail to provide enough oil pressure to deliver oil to all the moving parts around the engine.
Oil change intervals vary considerably from bike to bike. Larger adventure bikes with larger oil capacity can have oil change intervals of 5000 km or more. Lightweight enduro bikes with higher strung engines and smaller oil capacities on the other hand can have oil change intervals of 15 hours or less. The key is to know the oil change interval of your bike and change the oil before the interval is exceeded.
When a motor is in a healthy condition, generally it won't consume oil. In some cases however, bikes both old and new will consume oil to some degree. Some models of new bikes are notorious for consuming oil throughout the break-in period. Checking and ensuring your oil level is spot on before each ride is important to preventing costly (and avoidable) damage to your motor.
Coolant
When a coolant system is in good health the coolant level will barely move for months on end. Inspecting your coolant level before each ride is an effective way to check that your coolant system doesn't have any issues such as a leaking radiator, hose, cap, water pump seal or head gasket.
Air Filter
The air filter is right up there with oil and coolant regarding a crucial role in your motor’s health. When your air filter is clean and has the correct amount of air filter oil applied, it will be filtering out all the dust and other foreign objects that can enter the motor and cause premature wear. Cleaning your air filter will likely be one of the most common maintenance tasks performed, especially if you ride in dusty conditions.
Most air filter cleaners and oils on the market do a perfectly adequate job. The brand you use has less importance than the actual task of keeping your air filter clean and oiled. The interval will vary considerably mostly due to riding conditions. Some bikes can happily go weeks between air filter cleaning when riding in dust free conditions. When you are riding in dusty conditions, especially in a group, it is common to quickly clog up air filters which then need to be cleaned and re-oiled on a daily basis.
Determining if your air filter needs cleaning has a simple solution. If in doubt, clean it! Cleaning and re-oiling and air filter is a quick and inexpensive exercise. More good will come of cleaning your air filter prematurely than running an air filter that is clogged and is allowing debris into your engine.
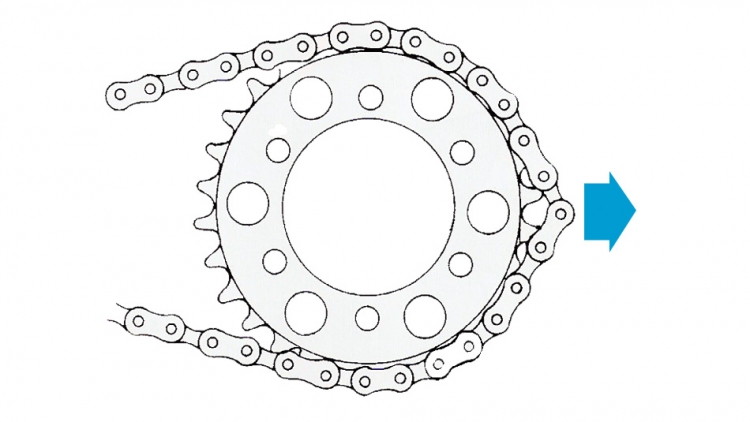
Chain and Sprockets
Riding with the correct chain tension is important. Riding with a chain that is too loose amplifies backlash when accelerating/deaccelerating and can cause premature wear to the drive train. It also risks the chance of derailing the chain and causing damage; especially at high speeds. Riding with a chain that is too tight on the other hand can put excess tension on your output shaft bearings and destroy them.
Over time your chain tension can fall out of tolerance so a quick check before each ride to make sure the chain tension is within the factory recommended tolerance will address this maintenance point. Each bike will differ, the best bet is to refer to your owner's manual to set the correct chain tension.
The sprockets themselves need regular inspection once you start to approach their end of life. The life of a chain and sprocket set will vary considerably based on both the type of bike, the environment it is ridden (eg muddy/sandy) and how hard the bike is ridden by the rider. Horsepower also plays a massive role on lessening the life of a chain and sprocket set when a bike is ridden hard. As an example, the chain and sprockets on a KTM 500 when ridden gently can last up to 18,000 km. On that very same bike, when it is ridden hard, this can be reduced to 5,000 km; less than a third of the life. Your right wrist can directly influence replacement intervals and how much precious money escapes your wallet!
To check the chain and sprockets there are three simple tests.
Test #1 : visually check the front and rear sprockets for damaged teeth or worn profiles.
Test #2 : visually check the chain for damage, rust, tight links, broken O-rings or worn rollers.
Test #3 : pullback on the chain at the centre of the rear sprocket. If the chain and sprockets are in good condition, there will be very little play and the chain should fit the rear sprocket quite snugly. If the chain is worn, you will be able to pull the chain out quite some distance. This will indicate that the chain is worn and in need of replacement.
Keep in mind that if one of the sprockets or the chain itself is worn, you will need to replace the chain and sprockets as an entire set. Installing a new chain on worn sprockets or installing new sprockets with a worn chain will result in rapid premature wear. Golden rule: always change the chain and sprockets as a set.
Brakes and Rotors
Most brake callipers will allow you to view how much braking material is left on the brake pads by simply looking at them. A general rule of thumb is that once brake pads reach 2 mm in thickness, they will need to be replaced. Make sure that when you are checking the brake pads for wear that they are wearing evenly. Uneven wear can indicate a seized brake piston or a worn (notched) brake pin.
For the brake rotors, run your fingers across the braking area of each rotor and check that firstly there is adequate thickness and secondly that there are no big scores/gouges. Either of these faults will indicate the rotor needs to be replaced. If the rotor is deeply scored and you replace it, you should also replace the brake pads at the same time as the brake pads will mirror the scored rotor wear.
Wheel Bearings
Wheel bearings on adventure bikes get a hard life and generally need replacing far sooner than road bikes that typically get tens of thousands of kilometres before needing to be replaced. Wheel bearing life will be influenced by bike type, rider style, weight of the load carried and the terrain being ridden.
It is common for wheel bearing dust seals to either get damaged or worn out when riding dusty/sandy/gritty/muddy terrain. This can lead to debris getting past the dust seal and damaging the bearing seals themselves. This can allow the bearings to breach water when crossing rivers and dramatically reduce the life of the bearing. In some cases, this can be 5,000 km or less. Checking the condition of your dust seals and the wheel spacers is important and is best done when the wheel is off; normally when you are fitting a new tyre or doing bike preparation for an upcoming ride.
To check the wheel bearings with the wheels on the bike, raise the bike on a jack or stand so the wheels are off the ground. Grab the wheel with both hands, each hand should be on opposite sides of the wheel. Wiggle the wheel back and forth to see if there is any play in the wheel bearings. Rotate the wheel 45 degrees and check again. Do this for the full 360 degrees of the wheel. If there is any play whatsoever this will indicate a shot bearing.
To check the wheel bearings with the wheels off the bike, slide a finger into the bearing and rotate it a few times. You are checking that the bearing spins smoothly and relatively freely. If there is a rough or notchy feeling, this will indicate a shot bearing.
If you discover a shot bearing the best practise is to replace all the bearings in the wheel; not just the shot one.
Bolt Check
Over time nuts and bolts can work themselves loose from vibrations or knocks. A bolt check involves walking around the bike and checking that all external nuts and bolts are torqued correctly. This process does not take long and is key to good bike maintenance. Additionally, it provides great peace of mind that when you are riding, everything is as it should be.
The bolts to check will vary from bike to bike however common nuts and bolts to check are the wheel nuts and pinch bolts, brake calliper bolts, triple clamp bolts, steering head bolt, handlebar pinch bolts, subframe bolts, handguard bolts, seat bolts and plastics/fairings bolts.
Visual Check
Over time bike wear will naturally occur as you ride. Aside from bolts working themselves loose, oil seals may begin to weep and you may damage parts of the bike which will need replacing. A good walk around the bike visually inspecting for damage doesn’t take long and is key to good bike maintenance. Additionally, it provides great peace of mind that when you are riding, everything is as it should be.