Adventure Riding Puncture Repair Equipment
Punctures and adventure riding go hand in hand, so having the right gear packed in your motorcycle toolkit to deal with punctures is a must. However, there are multiple approaches, techniques, and products used to deal with a flat tyre out on the trail. This can be confusing for those new to the adventure riding or dual sport riding scene, so this article aims to provide some clarity.
After exploring some of the options and products out there, this article offers you a simple and reliable method to repair a flat tyre, that most seasoned adventure riders would agree with, as being the best.
This article specifically focuses on the repair of a tubed tyre, and is intended to help riders that venture into remote locations where it is paramount to be able to repair a flat tyre, and carry on. This is of course even more important, if you are a solo rider. With this in mind, the criteria for a puncture repair system needs to be:
a) Compact, lightweight and easily packable: this doesn't really need explanation, we all know the lighter and more compact we can pack our adventure bikes, the better.
b) High quality: All products should be high quality and not prone to failure in the field.
c) Durable: luggage carried on an adventure bike gets a hard life, it needs to handle prolonged vibrations, knocks, plus be able to handle repetitive use.
d) Able to repair multiple punctures: it is not uncommon to get multiple punctures on one trip therefore the system needs to be able to handle multiple puncture repairs.
So, with the criteria set let's have a look at one of the options that pops up frequently:
Aerosol puncture repair fillers
There are a large number of aerosol filler products on the market and on the surface they look like a convenient way to repair a puncture without having to remove the wheel and tyre. By attaching it to the tube valve stem, these aerosol fillers inject a gooey substance into the tube to plug the hole while also injecting gas to bring the tyre up to a rideable pressure. Great right? No, not really.
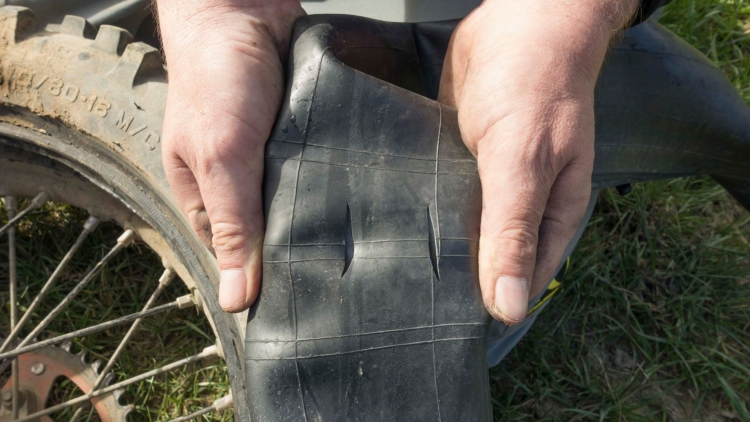
Firstly, these are only suitable for slow leaks or small holes. A decent impact puncture or snakebite normally can't be successfully sealed with aerosol fillers, and worst of all, you're then left with a flat tyre that is oozing sticky goo everywhere!
Secondly, pressure reliability has a high failure rate. The internet is laced with people complaining about failures to seal the hole and then put enough pressure in the tyre to be rideable.
Thirdly, by filling the tube with a sticky goo your tube becomes a gooey throwaway item. If the puncture is not repaired by the aerosol filler, trying to apply a patch after the fact will often not work. Why? The gooey contents that seeps out the hole can act as an adhesive retardant and the vulcanising adhesive can fail to cure and adhere to the tube.
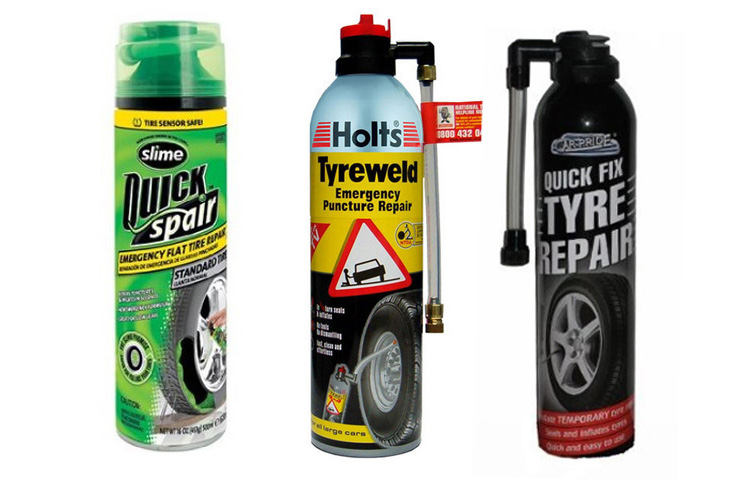
It's not that this product doesn't have its place, for road riders without the skillset to repair a puncture they can be a great way to get you to the nearest garage/motorbike shop to have it professionally repaired. As for serious adventure riding though, this is not a great option.
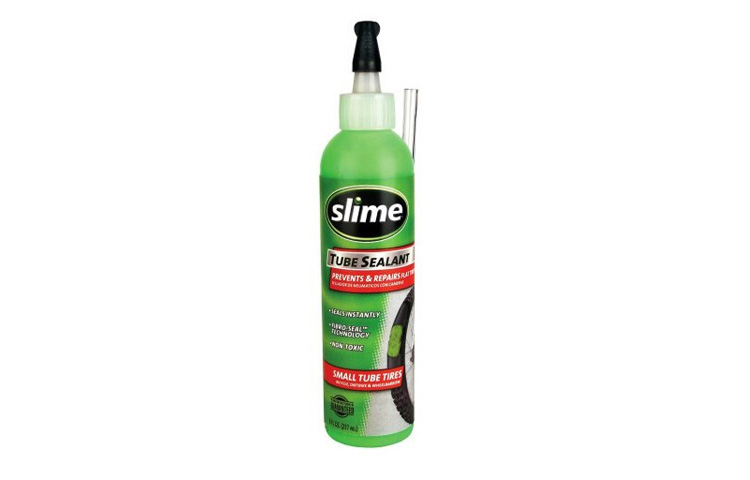
Aerosol puncture prevention fillers
Similar to the aerosol puncture repair fillers, there are also aerosol puncture prevention fillers like the product Slime Puncture Prevention. This works in a similar way by filling the tyre with a sticky goo and then bringing the tyre up to pressure with standard air. The objective is that this will “prevent” any air loss if you ride over a foreign object that would typically cause a puncture. While it does work to some degree, and many riders do like it, it has limited effectiveness against large impact punctures and snakebites, so is therefore not a bulletproof method to rely on to avoid punctures out on the trails.
So it’s off with the wheel and tyre then eh?
Yep, the reality is there's no magic product to reliably fix a puncture without patching the tube, or replacing the tube. So it’s a case of: wheel off, tube out, repair/replace, and then refit.
So, now that we've established the wheel needs to come off and we need to perform a puncture repair, next up is the list of items required to do this.
Puncture repair items required
1) - Tyre and tube removal/refitting tools
2) - Tube repair kit or replacement tube
3) - Pump
1) - Tyre and tube removal/refitting tools
This can be quite a personal topic with each rider having their own preference, especially for tyre leaver shape and length. Aside from the bike specific tools to remove the wheel, below are the the levers I prefer use for tyre removal and refitting a tyre. The levers look pretty old school compared to some of the modern tyre levers on the market, but I am so used to them, and have become very efficient with them, so I stick with them.
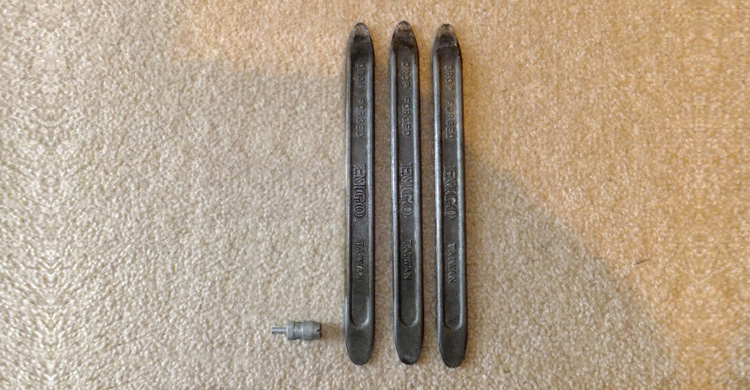
Tyre levers: Generally, you only need two tyre levers to remove a tyre to fix a flat. For that reason, most riders carry just two tyre levers. In cases where tyres have heavily reinforced and stiff casings, or when low temperatures make the casing stiff, three tyre levers can make the job much easier. Personally, the main reason I carry three tyre levers, is because all three can be taped together using electrical tape, and used as a hammer for knocking out wheel bearings on the out on the trails.
Valve remover: Ideally, get yourself a good quality metal valve remover with a decent diameter that offers good grip and leverage to easily remove valves. Don’t rely on cheap plastic valve removers like the ones that are on the top of valve caps. If a valve is tight, or becomes seized, the plastic valve removers will not be able to undo them. They will simple shred, and leave you with no way of removing the valve.
I won't bother going through the steps of tyre removal, there are numerous videos on YouTube on how to do this. My only advice to anyone new to changing tyres is that repetition is key. Your first tyre change will most likely be a bit of a struggle laced with many colourful swear words! Some people can be a little daunted by the task however the good news is the more tyres you change the more familiar you become with all the little tricks to simplify the task and dramatically reduce the time and effort it takes.
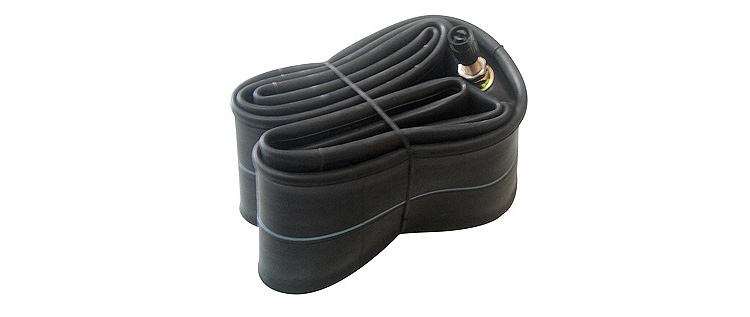
2) - Tube repair kit and replacement tube(s)
Along with a patch repair kit I always carry a spare front and rear tube in my toolkit. If the temperature is warm (allowing fast curing time) and I am not in a great hurry I'll often patch the punctured tube and reinstall it however if I am short of time or the weather is cold or raining (prolonging cure time) I'll simply bang in the spare tube and fix the punctured tube when I reach camp. Whatever the case I always carry a spare front and rear tube just in case the one in use is damaged beyond repair.
Heavy duty tubes versus standard tubes
Heavy duty or extra heavy duty tubes are more durable than standard tubes however they will still succumb to punctures be it foreign objects, impact punctures or snakebites. Personally I run (and carry spare) standard tubes based on the additional weight and size of heavy duty tubes. Comparing the two types of tubes side by side, an extra heavy duty tube can be nearly three times the space and weight of a standard tube and in my opinion, the extra space and weight is simply not worth it.
Reducing space
It is quite common to just carry one front tube as this can also be installed into the rear tyre. Although not ideal, it works and can get you out of a jam. Personally I like to carry both a front and rear for reassurance however carrying just a spare front tube is an option if you are pushed for space.
Patch repairing a tube
I won't go over the process of patch repairing a tube, it is very straightforward and there are numerous videos on YouTube demonstrating how to do it. My only advice is to make sure you let the vulcanising adhesive tack off. If you apply the adhesive, and then immediately apply the patch to the tube, not only will you have to wait a long time for the vulcanising adhesive to fully cure, sometimes the vulcanising adhesive in the middle won’t cure at all, and the patch can end up coming off down the road.
A second note is to only use a quality patch kit (patch and vulcanising adhesive) and carry a spare tube of vulcanising adhesive. I wrap my tubes of vulcanising adhesive with a cloth tape to avoid any rubbing or piercing causing a hole. If a hole is created and allows air to get in the tube of adhesive will begin to cure so when you next go to use it, it will be useless and you'll have no way of adhering the patch to the tube.

Is patching a tube permanent?
This question comes up a lot. Many people say that once a tube has had a puncture, a patch is a temporary get home solution only. Many riders disagree and say if you apply a patch correctly and securely it can last for years. If you are running medium to high tyre pressure then you can get away with running patched tubes. If you run low pressures this is known to lift patches making it a wise decision to replace patched tubes when you next get a chance.
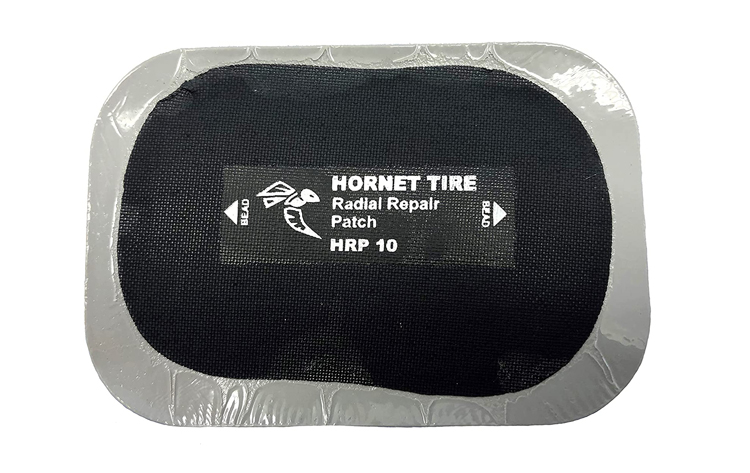
Tyre repair
For large impact punctures, gouges or splits in the actual tyre casing, these need to be repaired before you refit the tube or you'll find yourself with another puncture half a kilometre up the trail. The easiest way to repair a damaged tyre is with a heavy duty tyre patch. These are simply like an oversized tube patch. These patches will require a larger volume of vulcanising adhesive, for this I carry is an additional large tube of vulcanising adhesive that I purchase from an automotive store. They are around three times the size of a standard tube of motorcycle vulcanising adhesive.
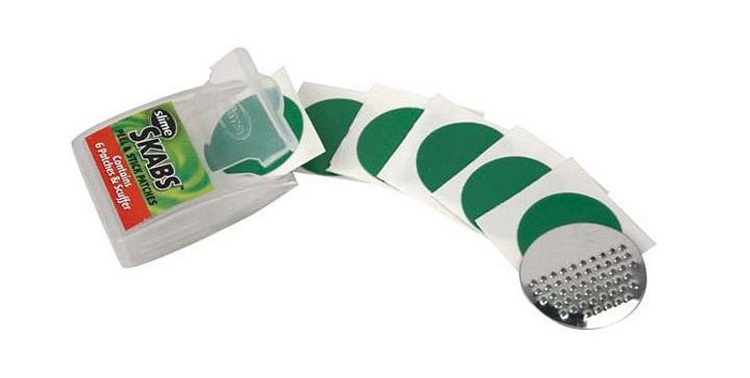
Tube scabs
Tube scabs had huge popularity when they first hit the market but when it was realised just how temporary they are, they quickly lost their appeal with many. They are essentially a tyre patch that you simply peel and stick onto the tube. One of the main benefits is that it is extremely quick to peel and patch the tube, refit the tube/tyre and get going again. The only problem is they are very fragile and it does not take long for them to lift and leak. A full day of riding is about the limit, they really are just a temporary get out of trouble option. I do not recommend these as a primary repair option however for the fact that they take up almost no room I carry a couple as an absolute worst case scenario should anything happen to my tubes of vulcanising adhesive.
3) - Pumps
Ok, so we've removed the wheel and either installed a spare tube or repaired the punctured tube and we are ready to refit the tyre and fire some air into the tube. So, what should we use to pump it up?
CO2 canisters
As novel as these are they’re only intended as a temporary fix to get you to the nearest pump. Most CO2 kits recommend that you immediately seek a standard air pump, deflate the tyre to remove the CO2, then reinflate with standard air. This is recommended due to the temperature sensitivity of CO2 and the fluctuations of tyre pressure as a result. With this in mind they are impractical as a sole inflation option for remote adventure riding.
Another thing to keep in mind is the number of canisters required to pump up a tyre to a rideable pressure. Use the below chart as an example.

Price up CO2 canisters and you’ll soon see that carrying large quantities of CO2 canisters to accommodate for multiple punctures is very costly and if you regularly inflate/deflate tyres to cater for on-road/off-road terrain, it amplifies the impracticality of CO2 canisters for adventure riding
Electric pumps
Electric pumps have become quite popular for adventure riding as a result of more reliable pumps becoming available. While most electric pumps are reasonably bulky regarding size, they do have a great benefit of pumping up a tyre quickly, and with minimal effort. If you're going to go down the path of an electric pump, the best thing you can do is buy yourself a good quality one.
Although there are numerous posts on advrider.com with riders claiming they have had good runs from their cheap $10 pumps purchased from Walmart, a good question is “do you really want to put your trust in such a low-quality item when you’re stranded in the middle of nowhere, and REALLY need your pump to work?”
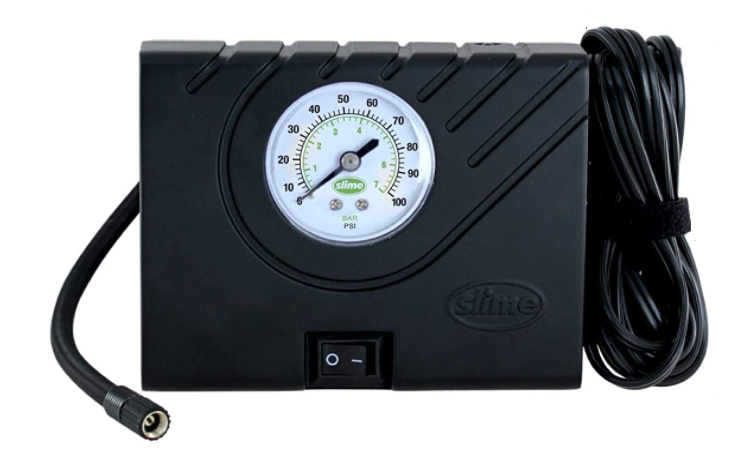
Buying a quality electric pump will increase the changes of it serving you well. Many riders get years of faithful and trouble-free use out of their electric pumps. However, just like any other electrical device with moving parts, they are susceptible to failure. Is the benefit of an effort-free 60 second pump-up time worth risking being in a remote place, flicking the on the pump switch, and hearing nothing but dreaded silence?
I’m not a pessimistic person, more so one who favours simplicity and reliability. This in turn leads onto the next options:
Hand pumps
Hand pumps are my preference, and the preference of many seasoned adventure riders. A good quality hand pump with a high output provides a reliable, durable and lightweight way to pump up tyres.
Some people criticise hand pumps for being slow to use, especially for pumping up the larger rear tyre. Low output hand pumps are indeed slow to use, however a good quality, high output hand pump, will inflate a rear tyre quickly and easily.
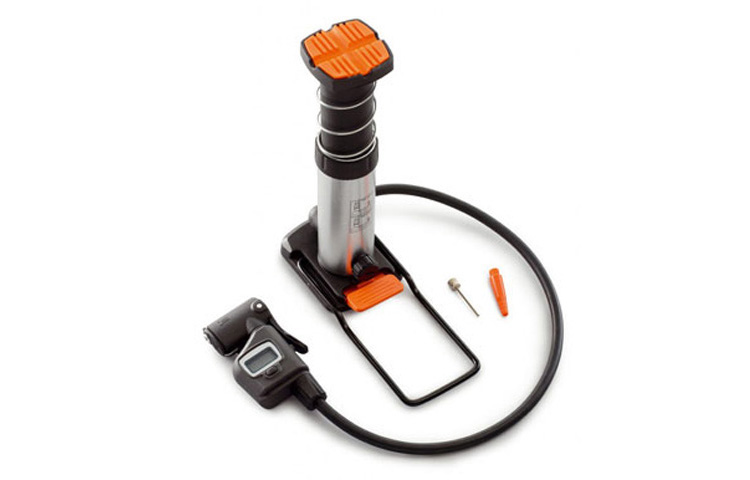
The hand pump I use is the Topeak Morph Pump which is a compact high output pump, with a flex hose, flip out foot stand, flip out T handle, and it is easy to disassemble for servicing - cleaning and re-greasing with rubber grease.

Foot pumps
Foot pumps use the same basic plunger technology as a hand pump, so naturally adopt the same level of reliability and durability. The only major disadvantage of a foot pump is that they are generally more bulky than a hand pump, but on the other hand, they are much quicker to use than a hand pump due to the increased bore size.
Trail Side Puncture Repair In Closing...
The goal of this article is to help riders find a reliable option for tube repair and inflation, when out adventure riding. When you are talking about riding in really remote places, or riding solo, it would be a safe bet to say that simplicity, reliability, compactness and the ability to deal with multiple punctures would be the ideal outcome.
So, when it comes to actual fixing of a puncture, a patch kit backed up with spare tubes is a far more reliable option, than aerosol cans filled with sealant goo.
Then, when it comes to pumping up your tyre, the trusty hand or foot provides the most reliable option, followed by a good quality electric pump.