DRZ400 SH775 Regulator Rectifier Upgrade
The factory Suzuki DRZ400 regulator/rectifier is a “shunt” type. It “shunts” peak current across the stator windings which can cause significant heat build-up in the stator and make it susceptible to prematurely burning out and failing.
The SH775 regulator/rectifier however is a “series” type. It has improved technology that “opens” or “blocks” the current. Because of this, there is no “shunt” of current across the stator windings resulting in a cooler operating stator. A cooler operating stator effectively means it will be far less susceptible to burning out and failing.
This article shows the installation of a SH775 regulator/rectifier on a DRZ400.
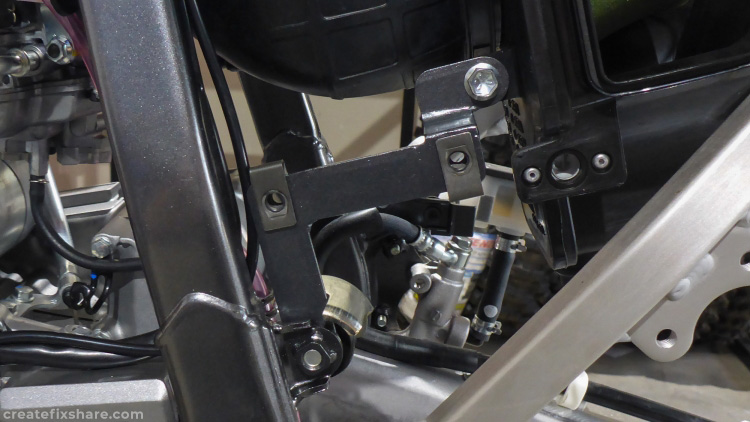
The SH775 regulator/rectifier is larger than the factory regulator/rectifier so it does not fit into the factory regulator/rectifier location. Instead, it is mounted on the other side of the frame by the airbox. The coolant overflow reservoir is removed and replaced with an aftermarket one (covered in a different article) to accommodate for the relocation. A mounting bracket is fabricated and utilises the top chain roller mounting point and the coolant overflow reservoir mounting point on the airbox.
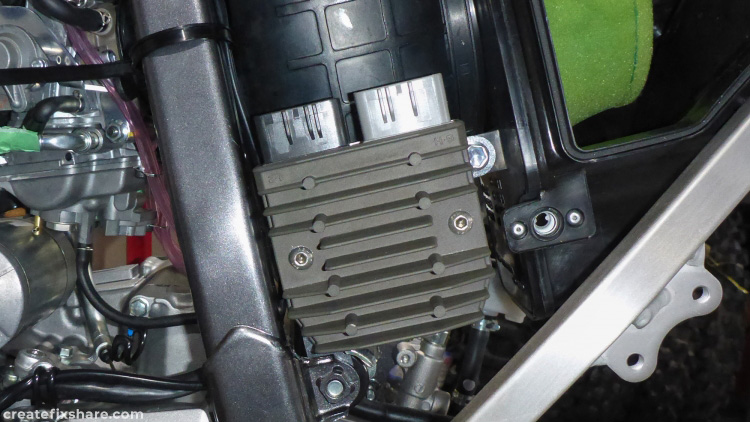
The SH775 regulator/rectifier mounted in place.
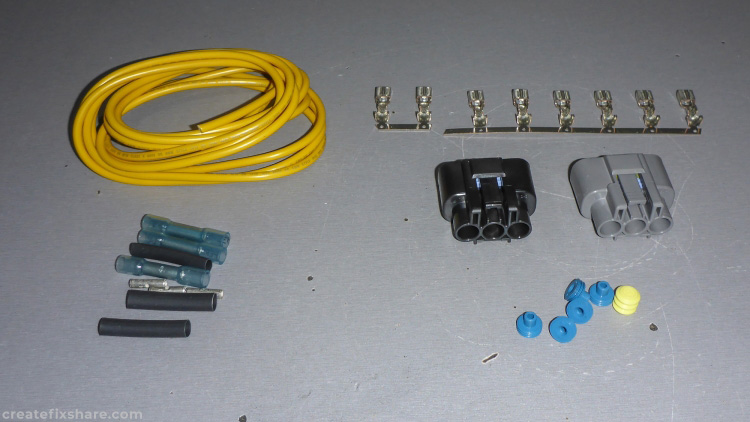
Preparing to wire up the Furukawa GLW-205 / 3 pin waterproof connectors.
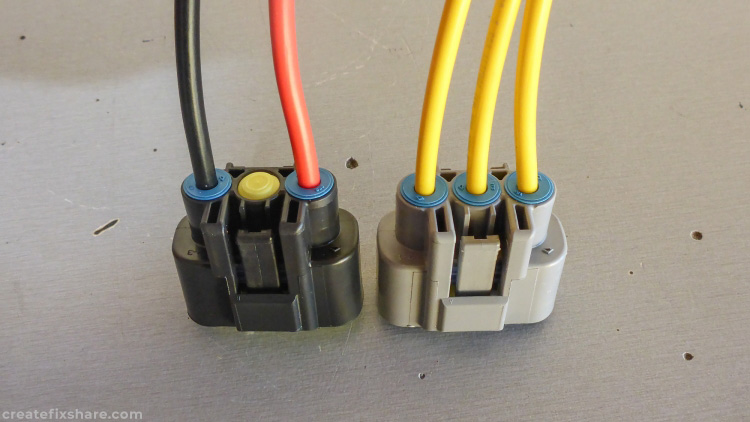
Connectors wired up.
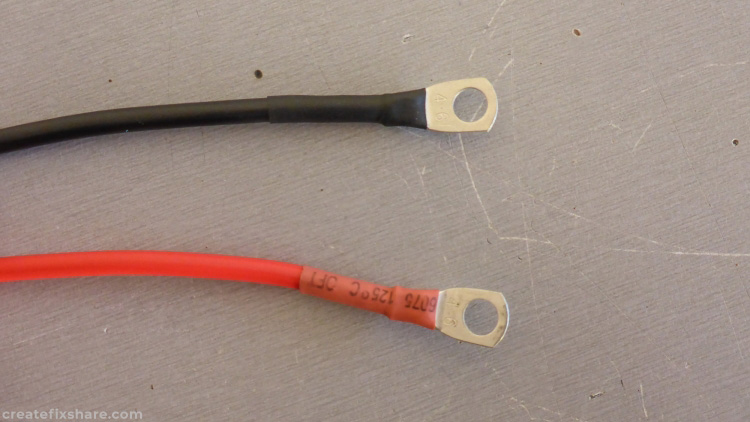
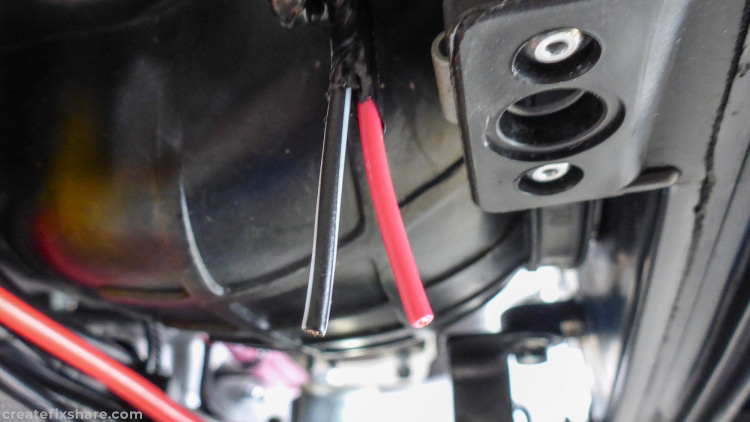
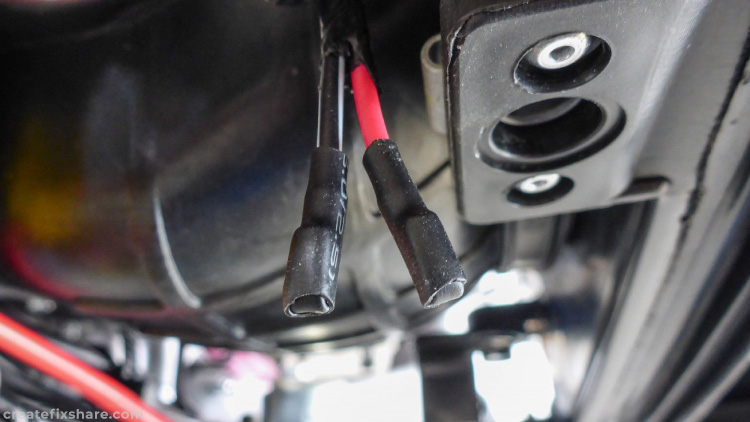
The SH775 regulator/rectifier DC output is NOT wired into the wiring loom like the factory regulator/rectifier. Instead it is wired directly to the battery. Battery lugs are crimped to the wires, then heat shrinked.
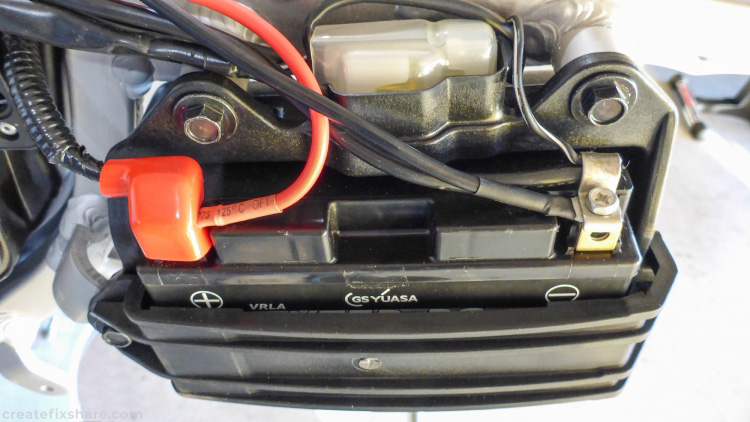
Photo showing the SH775 regulator/rectifier DC output wired directly to the battery. IMPORTANT NOTE: wiring of the regulator/rectifier directly to the battery is commonly known as the "free power mod". The DRZ400 factory wiring loom is subject to losses, wiring the regulator/rectifier DC output directly to the battery will gain approximate 1.0 volts to 1.5 volts in the DRZ400 electrical system.
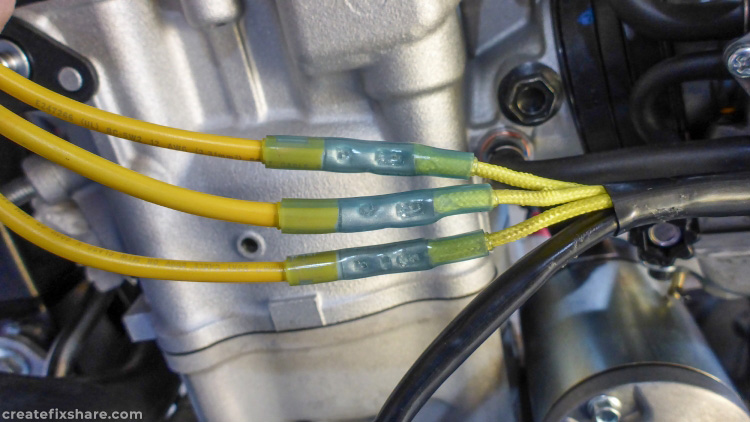
The three-phase stator wires are connected with heat shrink crimp connectors. These wires have no polarity so they can be wired up in any order. IMPORTANT NOTE: remove the factory three-phase plug. This plug is susceptible to burning out and failing. Removing it will effectively remove a potential future problem. Use wire connectors to connect the three-phase wires directly to each other.
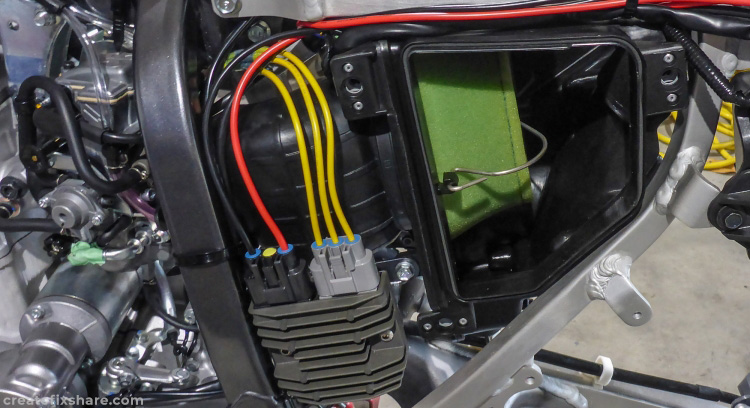
Photo showing the SH775 regulator/rectifier mounted and wired up.
The next step is to address the factory DC output regulator/rectifier plug.
Remove the factory DC output regulator/rectifier plug by cutting the two wires. Unlike the side stand switch mod or the clutch switch mod which create a "closed circuit", these two wires are left as an "open circuit".

Apply heat shrink to the end of the wires with overhang.
Fold the overhang back over, and secure by applying another section of heat shrink.
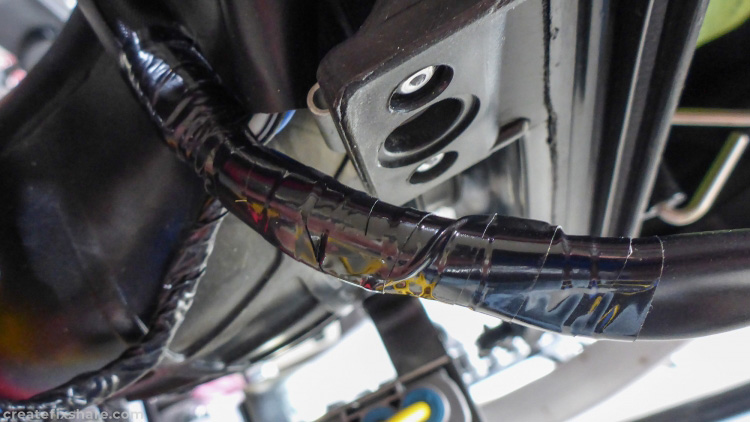
Using a quality electrical tape, neatly bind these wires into the main wiring loom for a nice tidy finish.
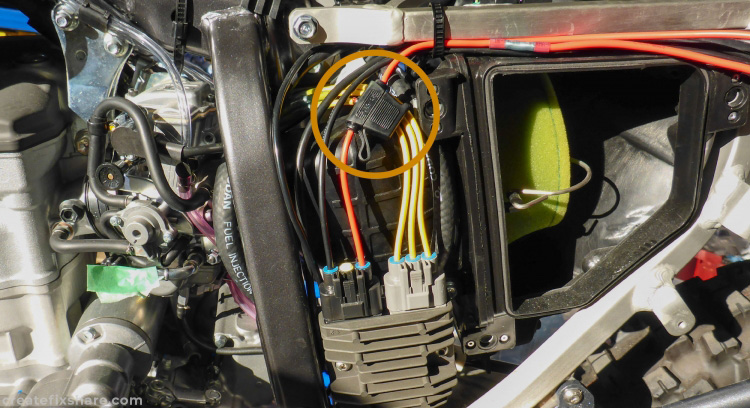
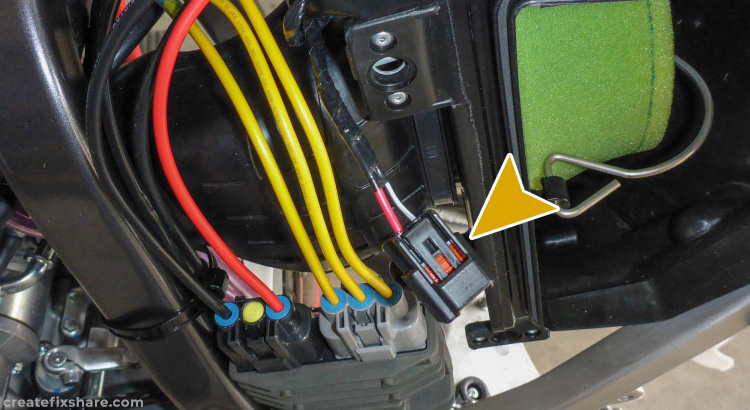
It is important to wire in either a 30Amp circuit breaker or a 30A fuse holder on the positive feed to the battery. In this case a waterproof, inline, blade fuse holder is used.
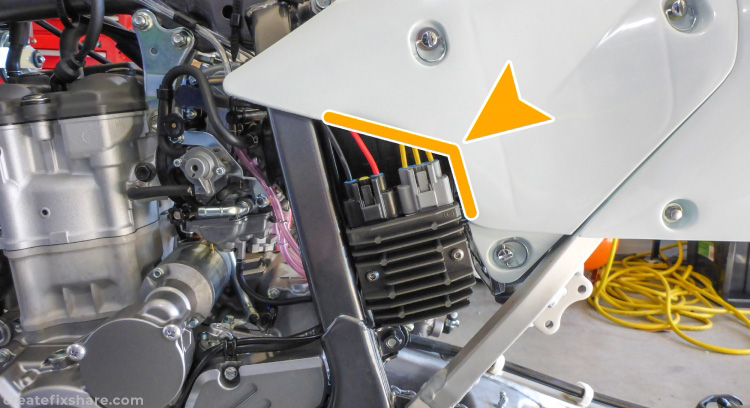
The last step is to cut a section of out of the airbox panel to accommodate for the oversized SH775. This can be done with a range of tools, I prefer using a Dremel. Note: this does not encroach on the section of the panel that seals the airbox, it is only the aesthetic section of panel removed.
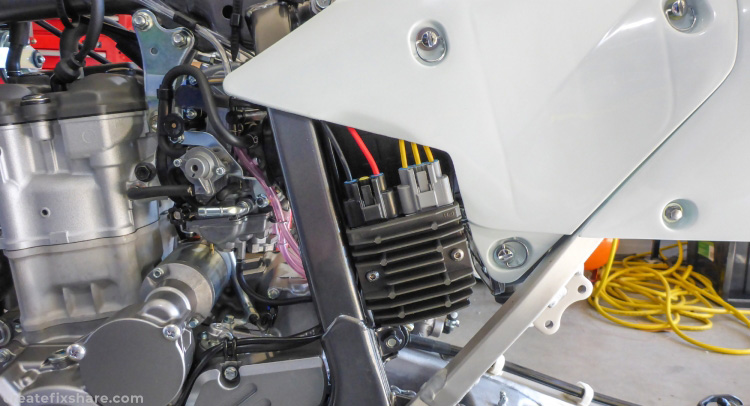
The finished result.
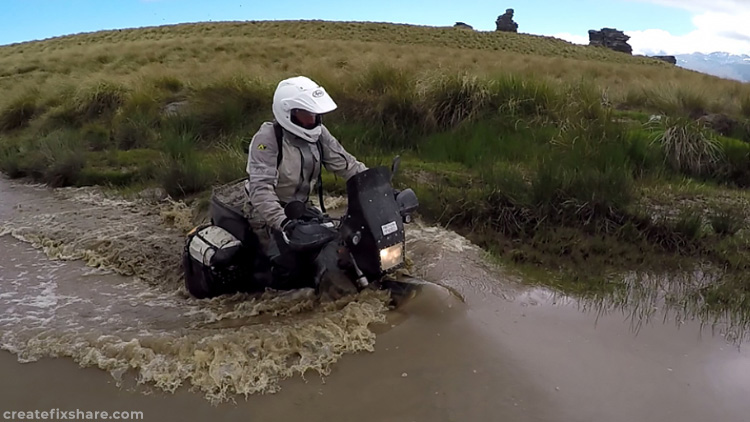
A question that often comes up is if the SH775 plugs are waterproof and whether the unit should be mounted with the plugs facing downward. The simple answer is the SH775 and the connectors are waterproof. Some Polaris and Can-Am models have the SH775 as their OE R/R, naturally Polaris and Can-Am wouldn't use a non-waterproof set up. The SH775 is found on numerous other bikes as an upgrade and while it can be mounted in any orientation, most of the mounting I've seen has been with the plugs facing directly up, or on an upward slant. I have mounted the SH775 on the DRZ400 with the plugs facing upward to keep the plugs safe and away from rocks, sticks etc in the swingarm area where the chain runs. To date I have ridden thousands of kilometers on my main DRZ400 with a SH775 fitted and it has performed faultlessly. I love New Zealand High Country riding so deep water crossings where the SH775 is fully submerged is a regular occurrence. The photo above is a typical deep water crossing where the SH775 is fully submerged, the bike never misses a beat and the SH775 plugs remain waterproof.