Fiberglass Fuel Tank Protectors
After a few decent drops in technical rocky terrain, my Safari tank was now sporting not only some significant scratches, but also some fairly deep gouges in the exposed front edge. The thought of a fuel breach somewhere remote wasn't overly inviting so I thought I'd better do something to prevent the possibility of this happening.
Toying with the idea of crash bars didn't last long as the whole aim of this bike is to keep it as lightweight as possible, this then led to the creation of slip on fibreglass tank protectors over the vulnerable areas. The following is a sequence of photos and details of how these were constructed and mounted.
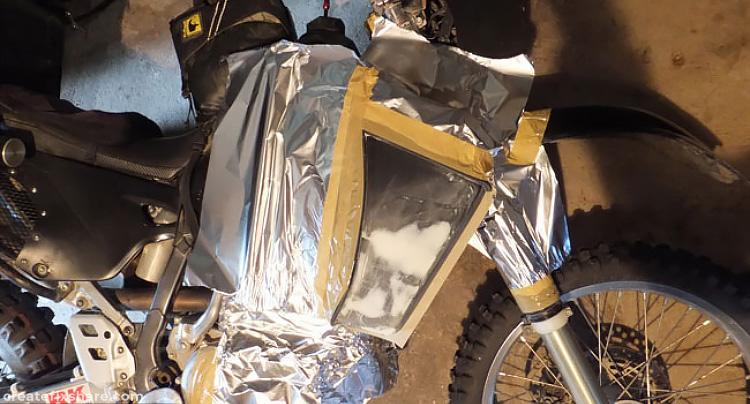
Using the actual fuel tank as the fibreglass plug, standard automotive filler was used to fill in the scratches and gouges (the filler was removed afterwards). The fuel tap was then turned off, the bike was laid on its side, border tape was used to create the perimeter of the tank protector (following the tank's contour lines) and foil was used as a splash guard so the bike didn't get covered in resin. Six coats of mould release wax plus one coat of mould release agent were applied before applying the fibreglass.

In this photo 4 layers of 300g chopped strand fibreglass mat has been laid and is being left to cure to create the fiberglass mould. Ideally, I should have used a gelcoat due to its hard finish and ability to be used time and time again, but because I only needed to make one set I just used standard fiberglass resin to create this mould.
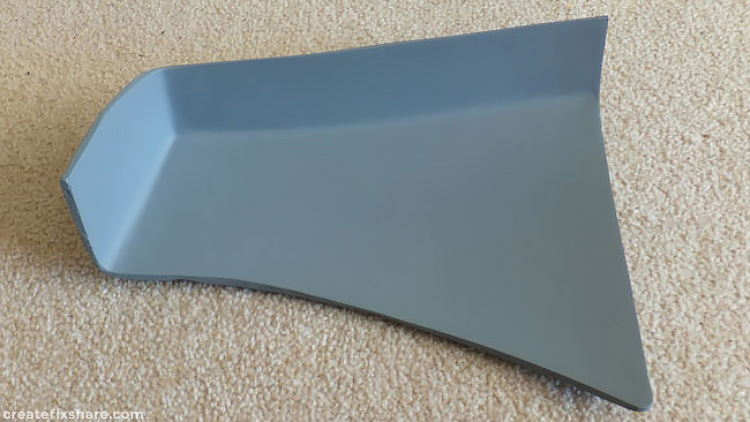
Here is the mould after being removed from the plug (the fuel tank). A primer-filler has then been applied to some of the imperfections, and then sanded back for a smooth finish. Six coats of mould release wax then applied.
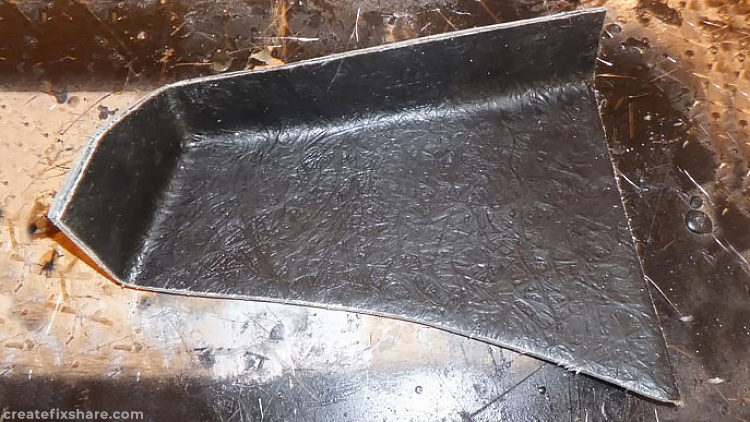
Here is the mould being laid up to create the final part. It was laid with three layers of 300g chopped strand mat with a black coloured resin dye. In this photo the edges have been trimmed with a knife while the fiberglass was still green (not quite cured).
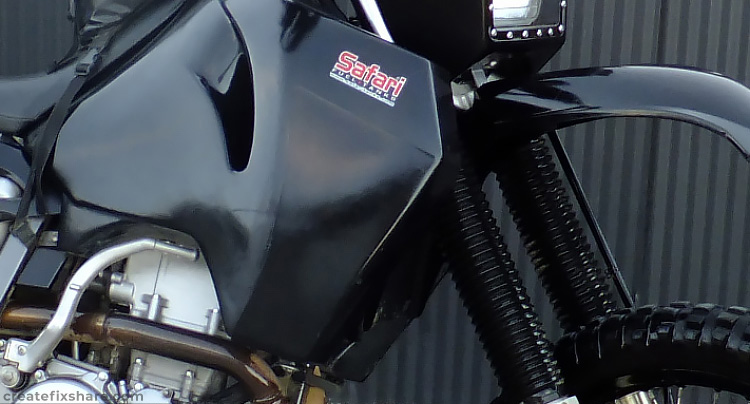
Once the final part had cured, a number of large blobs of RTV were used to securely adhere it to the tank, while still allowing fuel vapours to naturally escape from the fuel tank.
I used these tank protectors for many years. They stay in place perfectly, have proven to be very robust, and saved my tank from many big hits and potential gouges.