Building Adventure Bike Pannier Boxes From Fiberglass
This article steps through how a set of fiberglass panniers can be made using basic tools and supplies from a typical home workshop. The photo below shows the finished fiberglass panniers fitted to a DRZ400 followed by photos from the very beginning of the building process.
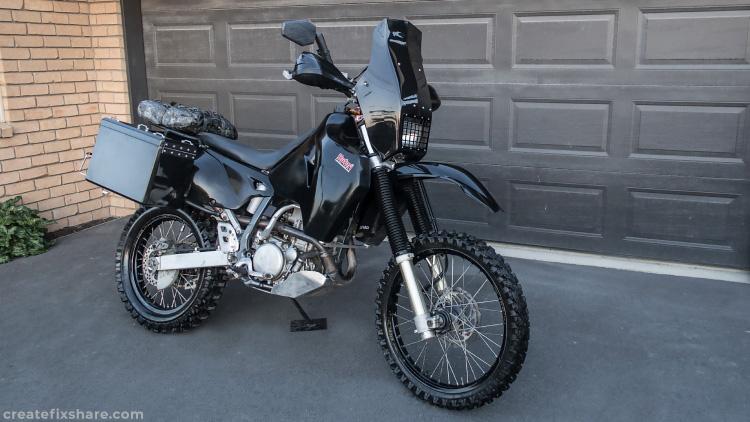
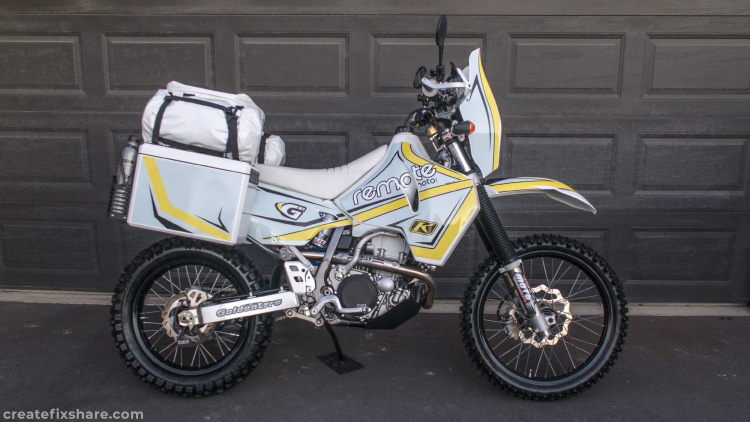
Fiberglass panniers fitted to a DRZ400.
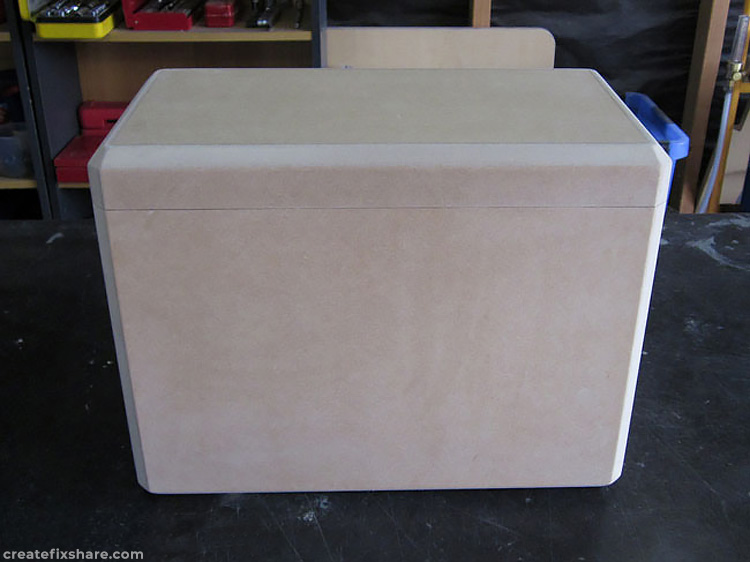
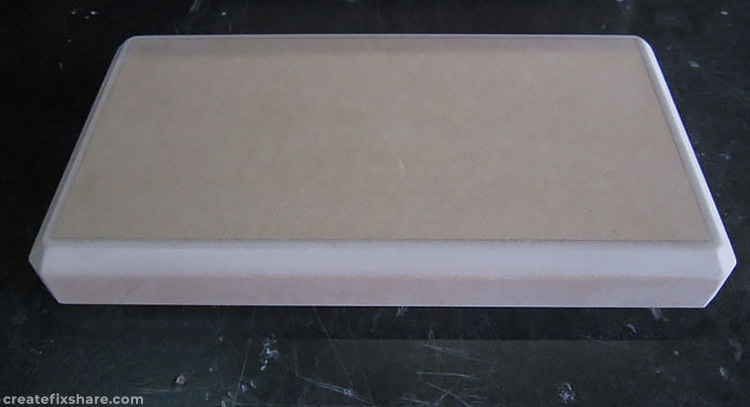
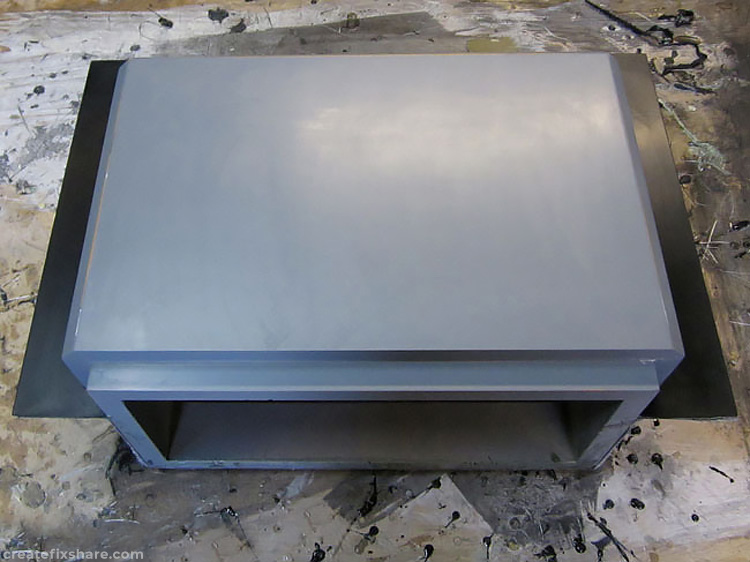
18mm custom wood was used to create the plugs for the pannier box mould and pannier box lid mould.
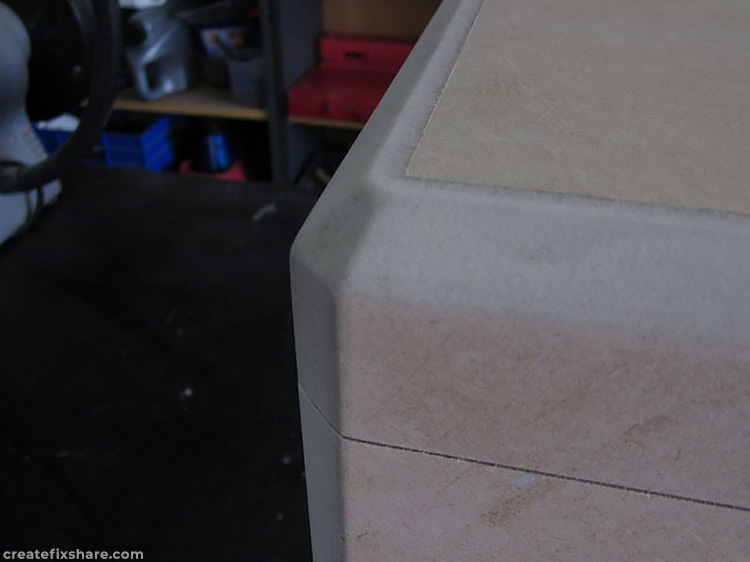
With a router, the edges were given a 45 degree bevel to both improve looks and remove all sharp edges/corners.
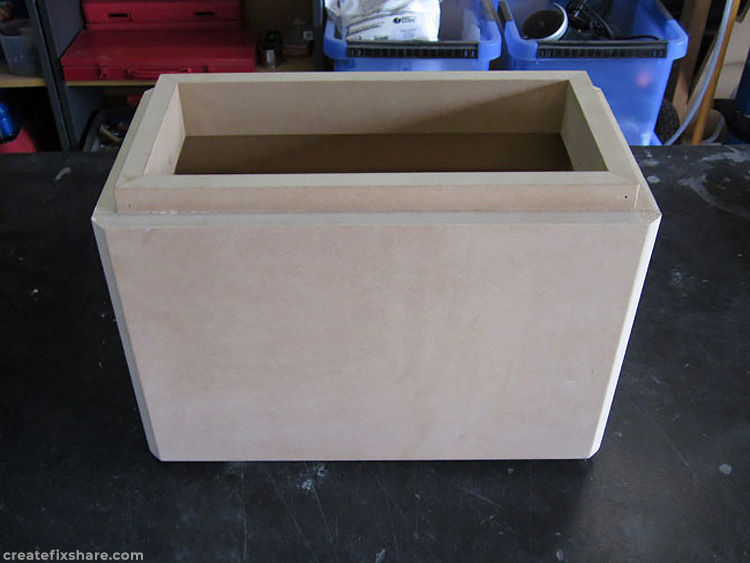
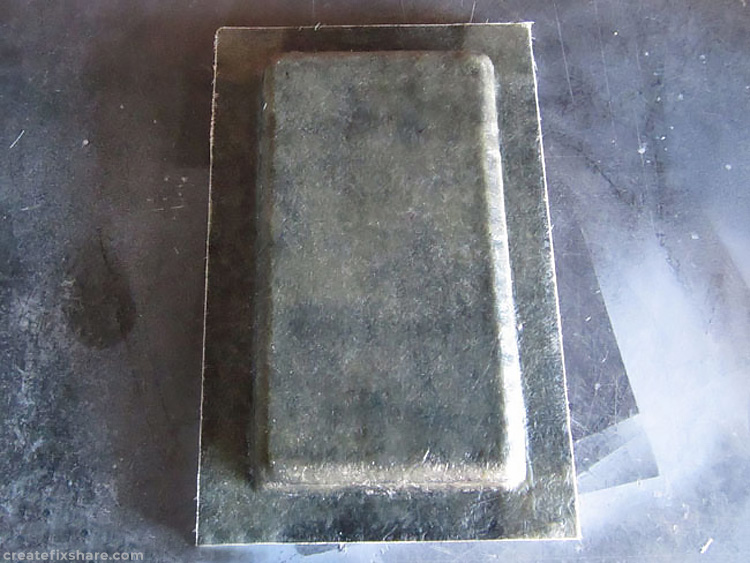
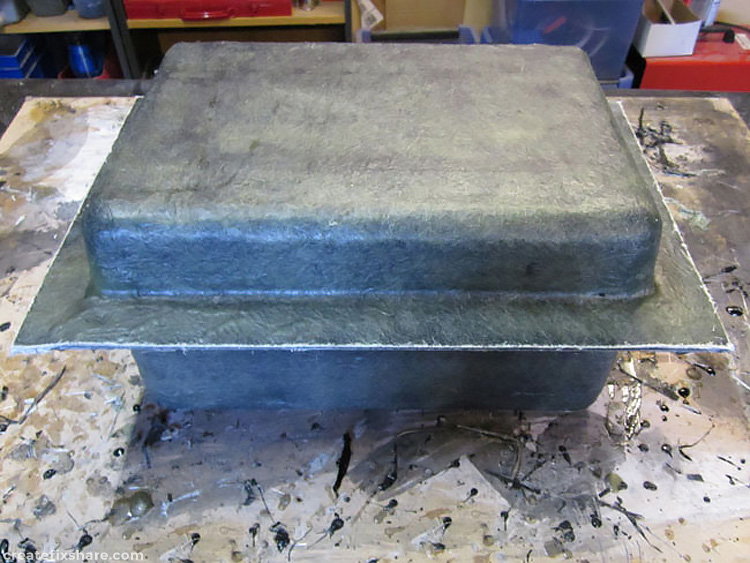
With the lid removed you can see the internal edges were given and extra lip (wet edge) to ensure water cannot make its way up and into the pannier boxes.
The pannier box lid removed from the box.
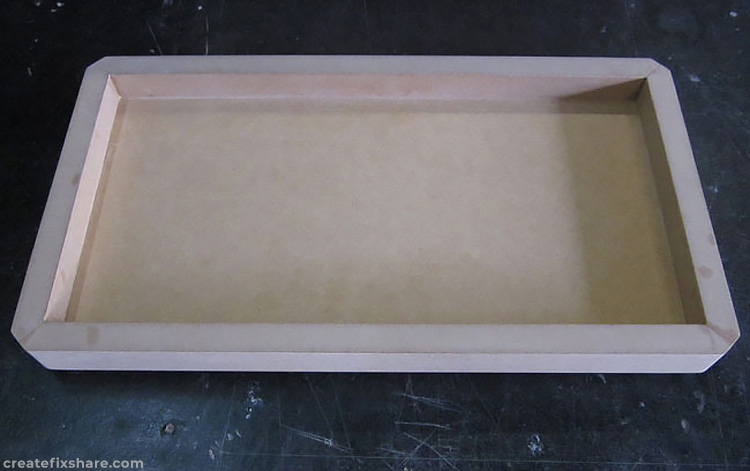
The pannier box lid removed from the box and flipped over.
A standard automotive primer/filler is used on both the pannier box and pannier box lid to seal the custom wood so they can have fibreglass laid over them to create the moulds.
Starting with the pannier box lid
First up I’ll go through the steps to complete the pannier box lid plug which creates the pannier box lid mould
The 18mm custom wood pannier box lid is glued to a baseplate to complete the pannier box lid plug. This will produce a mould that will have a ridged 90 degree border that will cast straight and true lids.
In this photo the pannier box lid plug has been laid with gelcoat and fiberglass to create the pannier box lid mould.
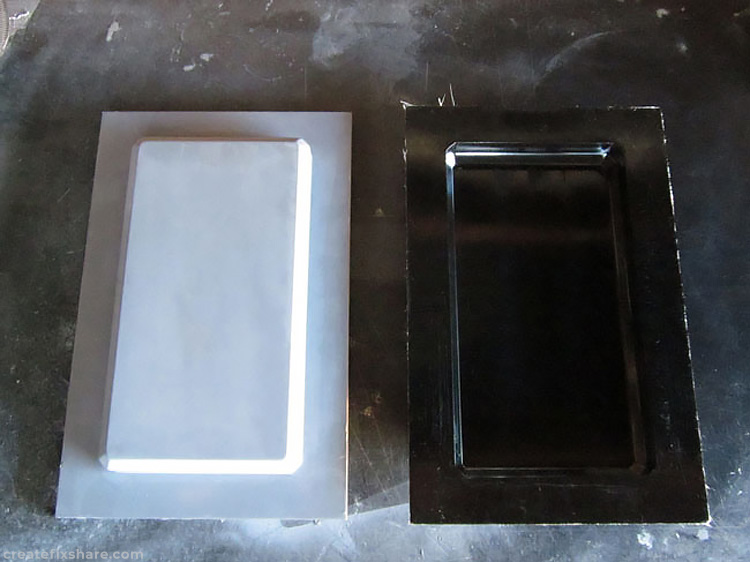
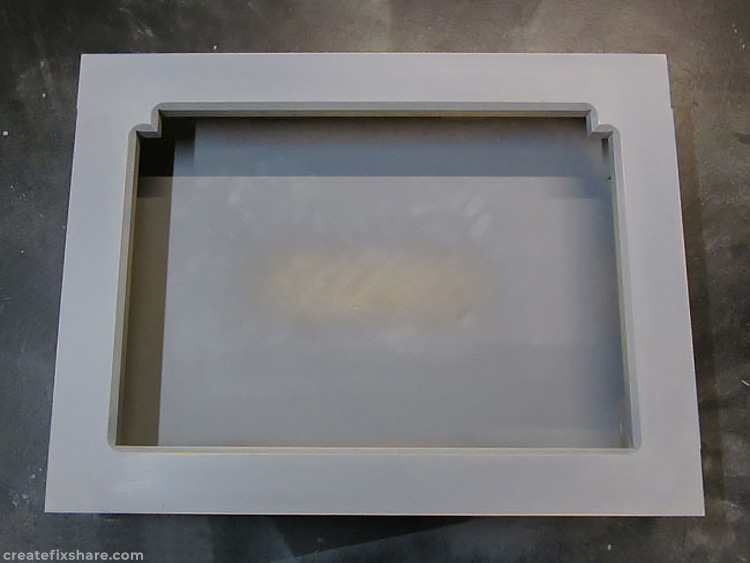
On the left is the pannier box lid plug and on the right is the newly created pannier box lid mould (cast with black gelcoat).
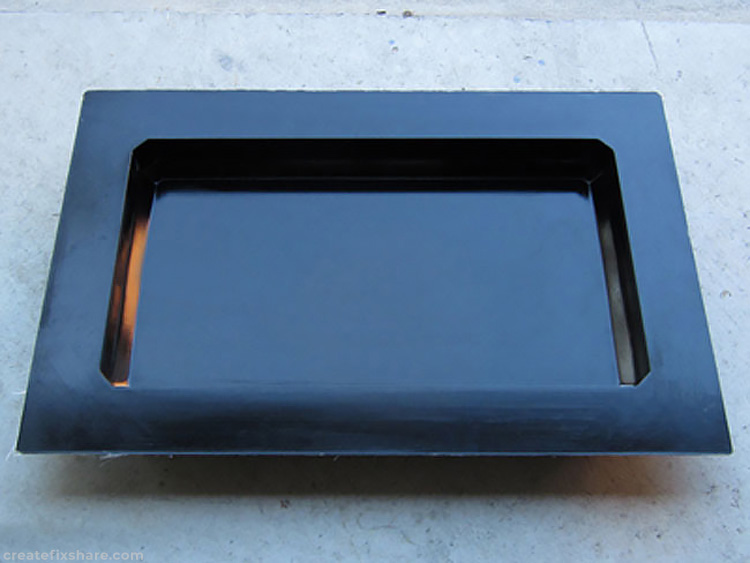
The final pannier box lid mould cleaned up and ready to layup pannier box lids.
Next is the pannier box
The actual pannier box itself is slightly more complex as it needs to be a two part split mould to accommodate for the wet edge.
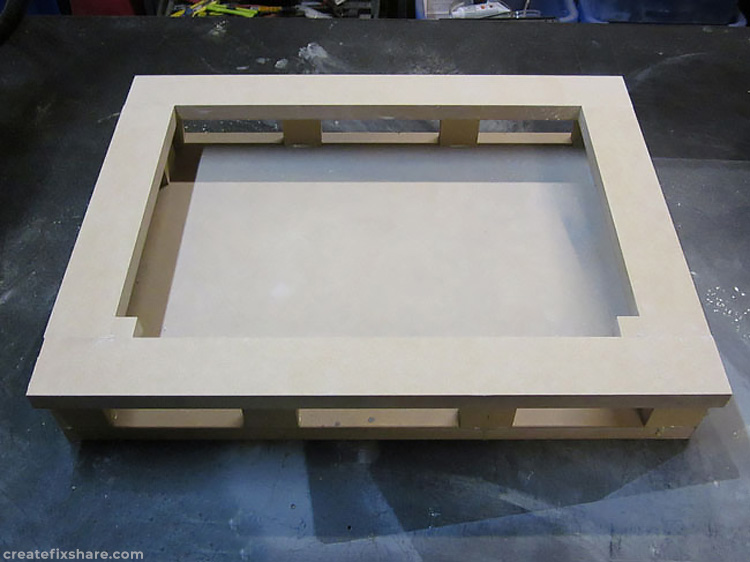
A cradle is created to help cast the pannier box in two sides. This cradle is made from custom wood.
With a router the edges were given a shallow 45 degree bevel to allow the use of putty for a tight seal, and then a coat of primer.
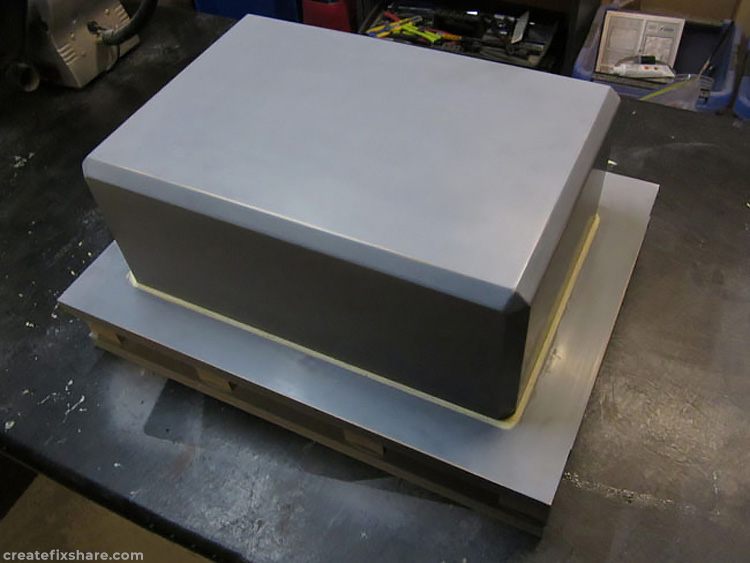
The pannier box is dropped into the cradle and putty is used to ensure the edges are snug and perfect. This will be used to create the first half of the pannier box mould.
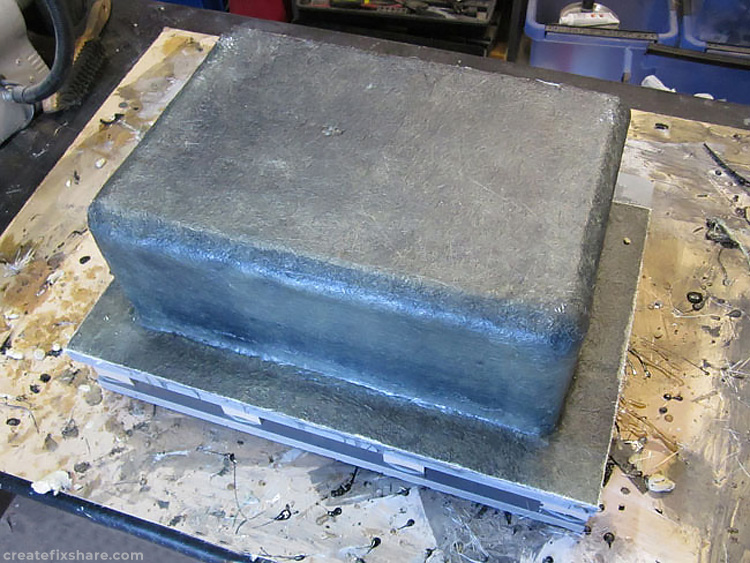
The gelcoat and fiberglass being laid over the plug to create the first half of the pannier box mould.
Another view of the gelcoat and fiberglass being laid over the plug to create the first half of the pannier box mould.
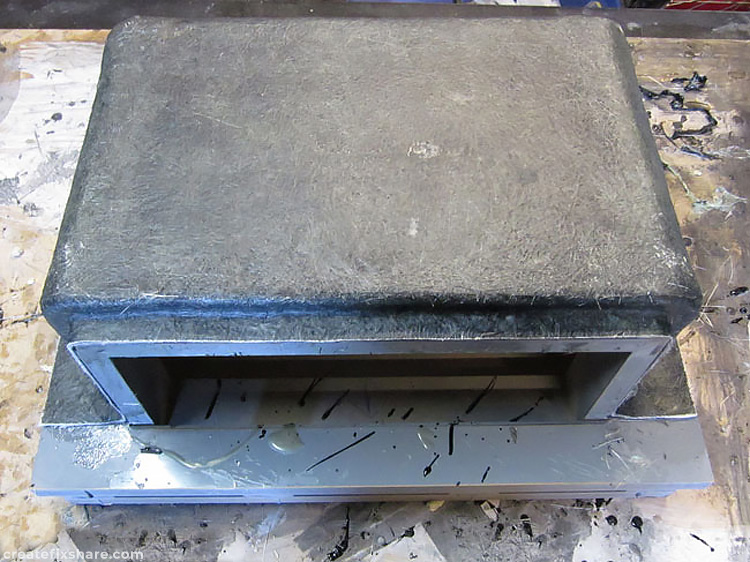
The box is then removed from the cradle. Both the pannier box plug and the fiberglass face of the pannier box mould are cleaned up and prepped for the laying up of fiberglass to create the second half of the pannier box mould.
The gelcoat and fiberglass laid up over the second side of the pannier box plug to create the second half of the pannier box mould.
Another view of the fiberglass laid up over the second side of the pannier box plug to create the second half of the pannier box mould.
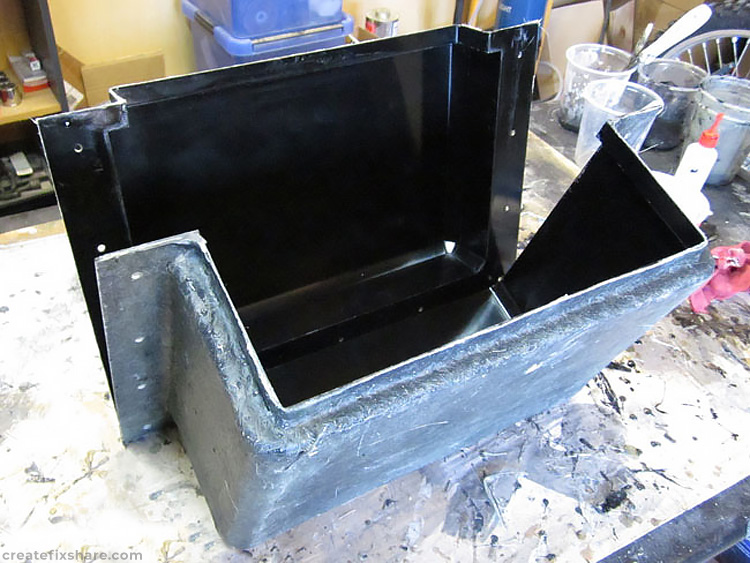
Once cured, the two fiberglass mould halves are then split to remove the pannier box plug. The two sides that now form the final pannier box mould are ready for clean-up and then laying up actual pannier boxes. Note that before splitting the pannier box mould halves, a series of holes are drilled so that the moulds are perfectly aligned when used.
Making The Final Fiberglass Panniers
Now that the pannier box mould halves and the pannier box lid mould are complete and cleaned, it is time to start making the final parts - fiberglass panniers.
The main pannier box mould halves are bolted together and layered in release wax. Then, the inside is laid with gelcoat plus three layers of 300 gram chop-strand mat. I am also using a black dye which is added to the Polyplex 6430 resin.
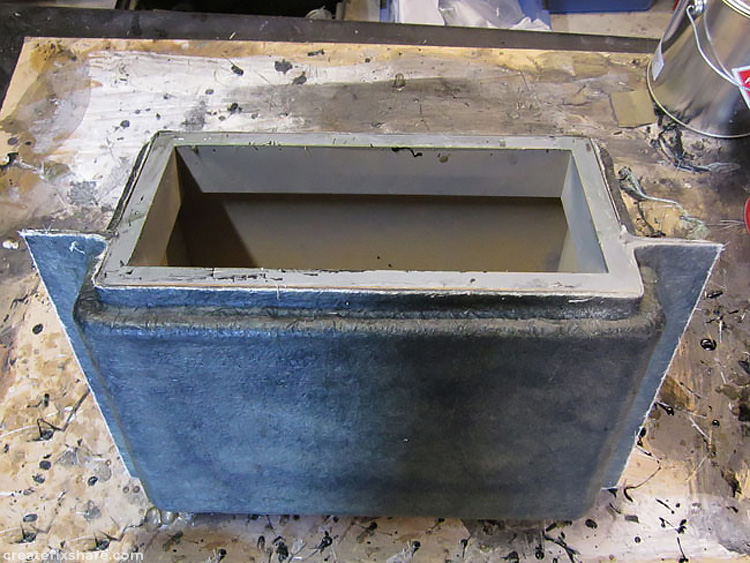
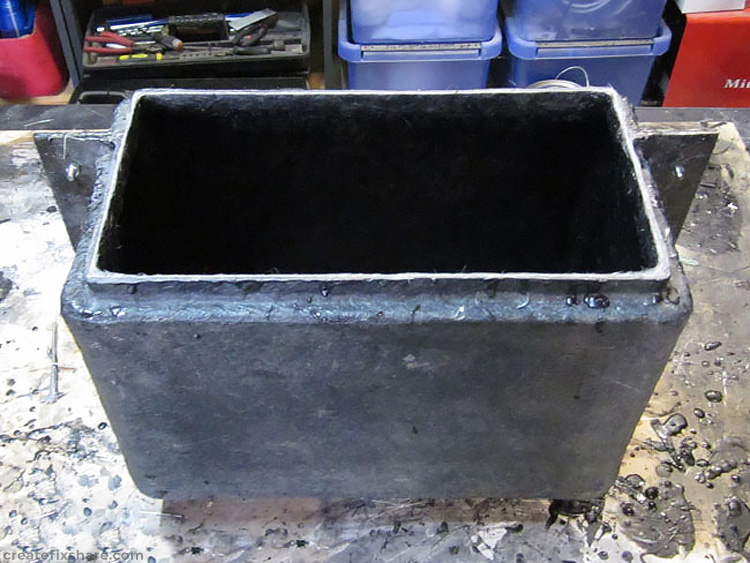
The final pannier box after being pulled from the mould halves. Here you can see the wet edge that stops water getting in even though the lid does not seal in any way and simply sits in place by means of hinges and a latch.
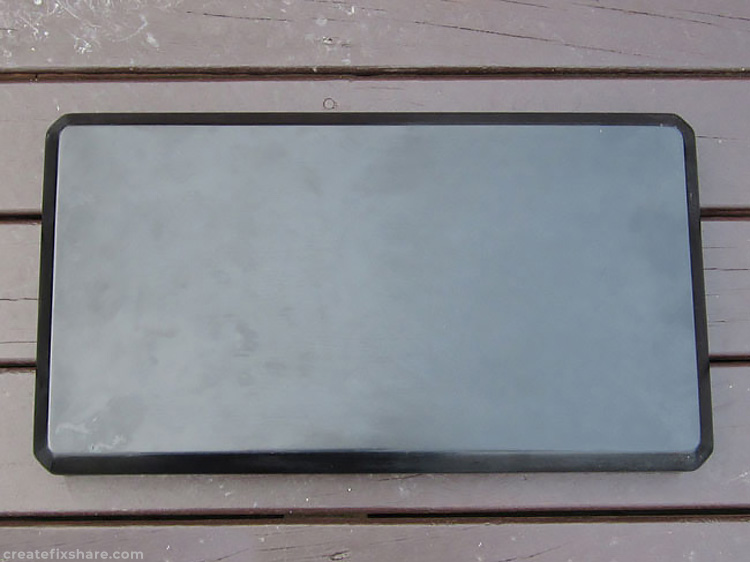
The final pannier box lid after being pulled from the lid mould after being laid with four layers of 300grm chop-strand mat.
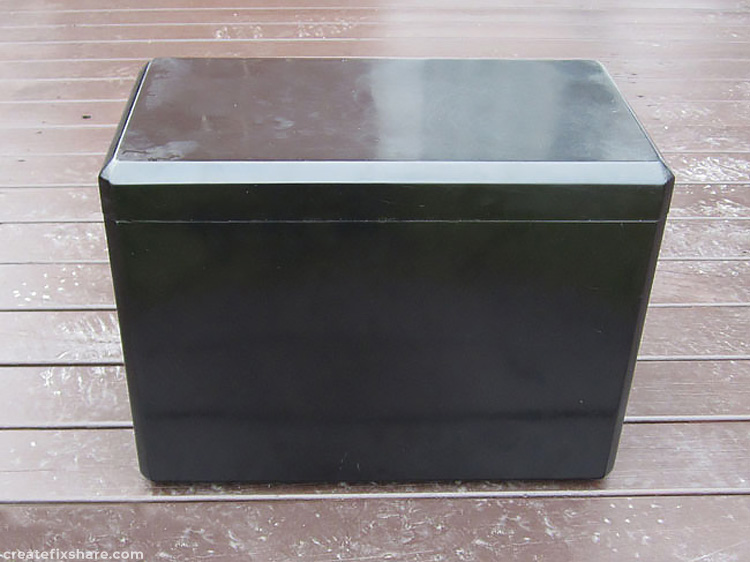
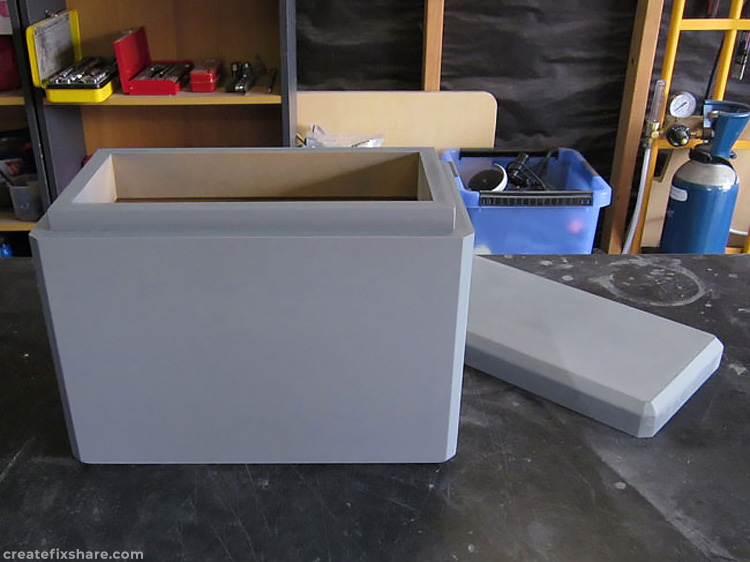
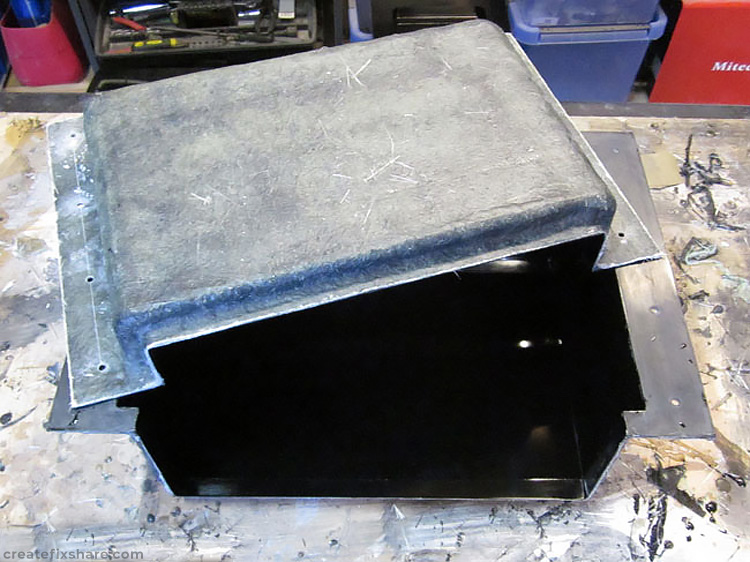
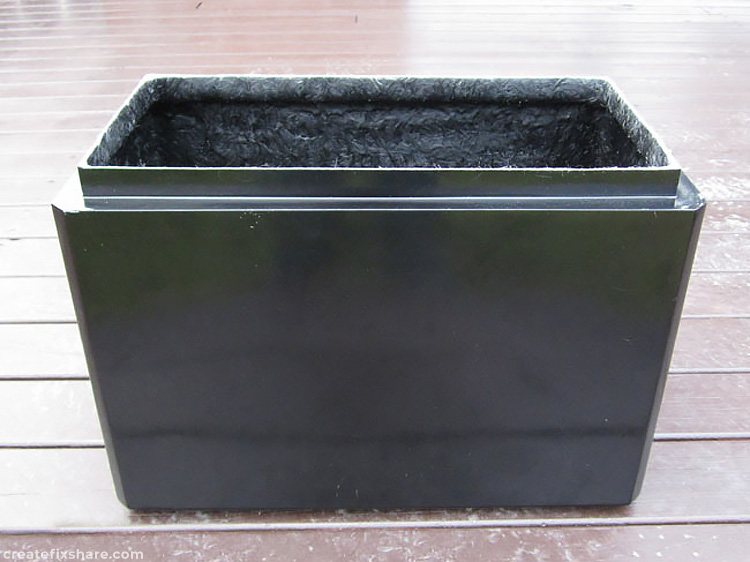
The final box with the lid sitting in place ready for cleaning up then adding the hinges and latch.
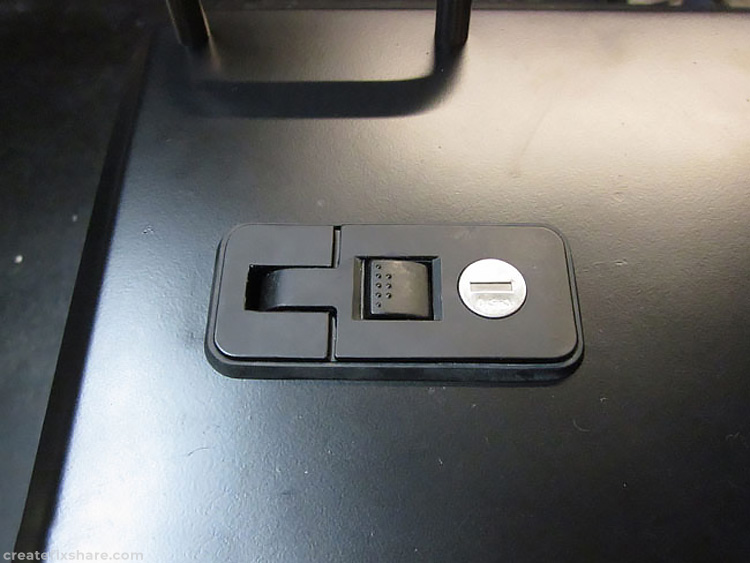
On some of the first panniers I tried using a flush-mount latch with a lock for security. While they looked good, the latch mechanism took up too much space inside of the pannier which interfered with packing luggage inside. I switched to a standard external latch which proved a much better option. The external latch has eyes for a padlock to lock the boxes securely.
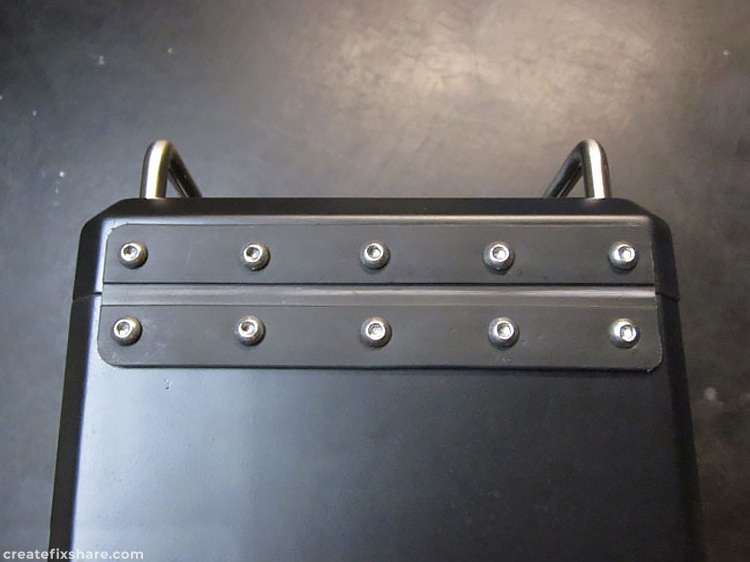
Over a period of a few months I tried a number of hinge options. In the end, the best product was PVC continuous hinge. Supposedly capable of handling 1,000,000 open/close actions, it has proven to be really durable. It is also extremely light, slim and looks good. The hinges are attached using 6mm stainless button-head hardware.
Footman loops are bolted to the tops of the lids using 6mm stainless button-head hardware. The later models, like this set, also had laser cut 3 mm aluminium top plates with groves to stop luggage strapped to the top of the pannier from sliding up and down the box. This works very well.
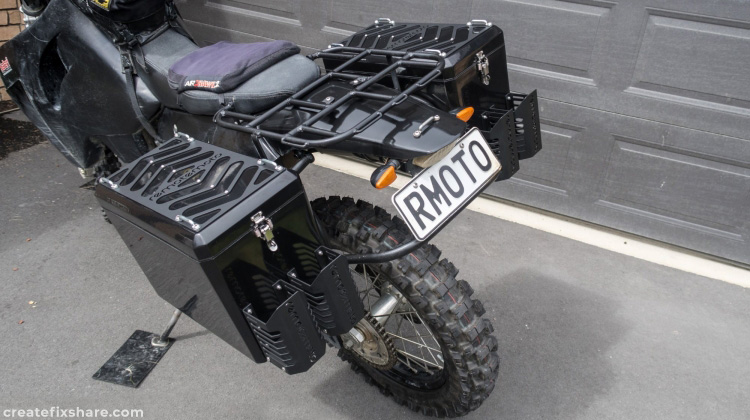
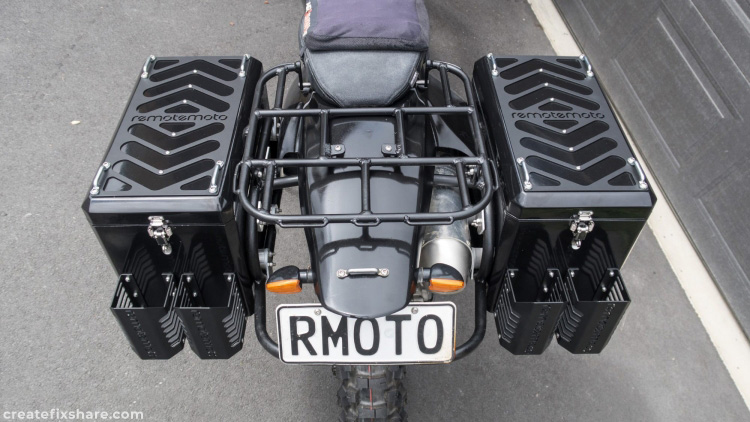
The panniers support two bottle cages perfectly. The ones fitted here were ones I designed and had laser cut and folded by a local fabricator.
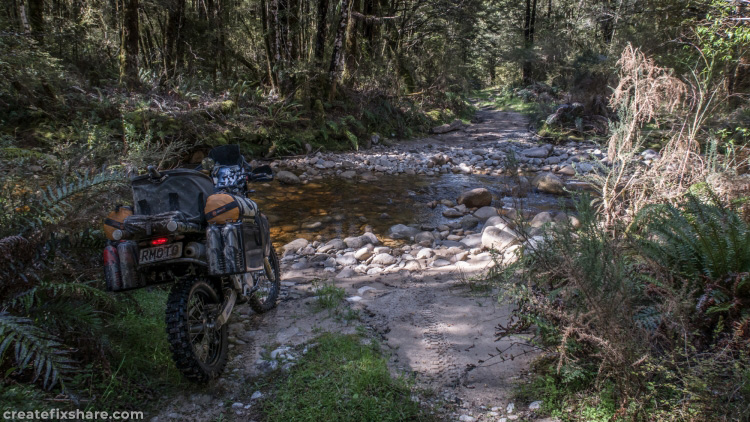
This pannier design has been used with great success on adventure rides all over New Zealand totaling over tens of thousands of kilometres.
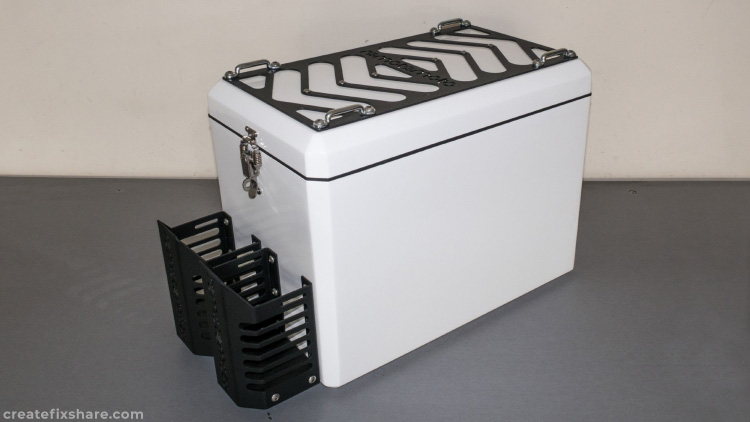
I also created white panniers.
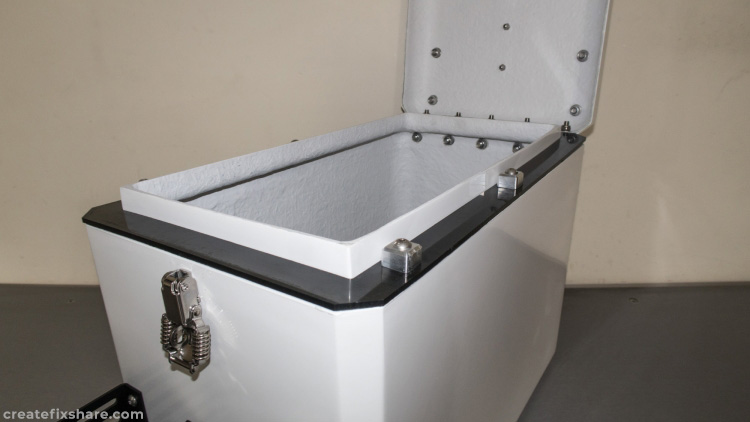
On the later model panniers, a polyethylene washer was used to stop the fiberglass to fiberglass contact and eliminate the wear that would result. The polyethylene washers work perfectly to completely avoid wear. The small CNC machined aluminium blocks are guides to keep the lids sitting squarely and securely.
I used these panniers on two black DRZ400 bikes that collectively clocked up over 200,000 km of riding in New Zealand. They proved to be brilliant panniers. The white panniers here, were fitted to a DRZ400 that was shipped over to Australia for a one month adventure ride through the Outback.
For more information on this build click here: DRZ400 adventure bike build.